How to Repair a Small Tear in Leather Car Seat
Are you dealing with a pesky tear in your leather car seat? Don’t worry, buddy, you’re in the right place. In this article, we’ll walk you through the step-by-step process of how to repair a small tear in leather car seat with ease. Whether you’re a DIY enthusiast or a total newbie, this guide has got you covered.
Understanding the Basics
Before we dive into the repair process, let’s talk about the basics. Leather is a delicate material that requires careful handling. When dealing with a small tear, it’s essential to act quickly to prevent further damage. The longer you wait, the more extensive the repair will be.
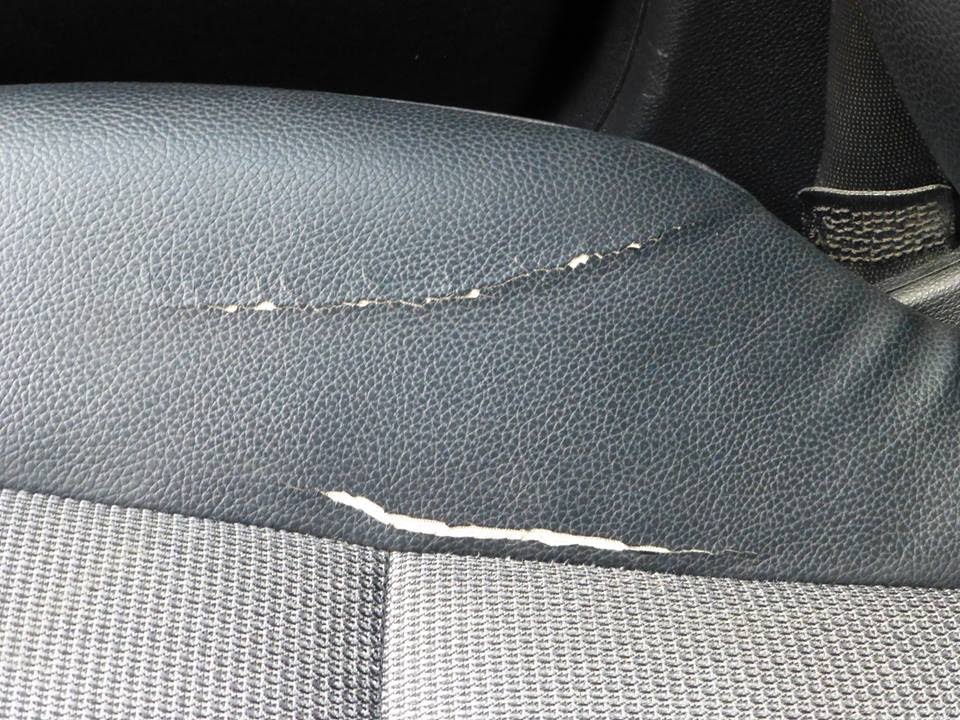
Types of Leather Tears
There are two types of leather tears:
- Simple tear: A small, clean tear that can be easily repaired with a few basic tools and materials.
- Complex tear: A larger, more jagged tear that requires more advanced techniques and materials.
For the purpose of this article, we’ll focus on how to repair a small tear in leather car seat using simple techniques.
Gathering Materials
To get started, you’ll need a few basic materials:
- Leather repair kit: You can purchase a leather repair kit at most auto parts stores or online. This kit usually includes a leather filler, leather adhesive, and a few other useful tools.
- Leather conditioner: A leather conditioner will help keep the leather soft and supple during the repair process.
- Microfiber cloth: A microfiber cloth will come in handy for cleaning and applying materials to the tear.
- Rubber cement: This is optional, but it can be helpful in repairing more extensive tears.
Choosing the Right Leather Repair Kit
When selecting a leather repair kit, make sure it matches the color and type of leather in your car seat. You’ll also want to check the contents of the kit to ensure it includes everything you need.
Step 1: Clean the Area
Before you start the repair process, it’s essential to clean the area around the tear thoroughly. Use a microfiber cloth to gently wipe away any dirt, dust, or debris that may be accumulating around the tear.
Using a Leather Conditioner
Apply a small amount of leather conditioner to the area around the tear. This will help keep the leather soft and supple during the repair process.
Step 2: Prepare the Tear
Using a pair of scissors or a craft knife, carefully trim the edges of the tear to create a clean, even surface. Be careful not to cut too much of the surrounding leather.
Using a Leather Filler
If the tear is particularly deep or jagged, you may need to use a leather filler to create a smooth surface. Apply a small amount of leather filler to the tear, and then use a microfiber cloth to smooth it out.
Step 3: Apply Adhesive
Take the leather adhesive provided in the repair kit and apply a small amount to the tear. Use a microfiber cloth to spread it evenly, making sure to cover the entire area.
Using Rubber Cement (Optional)
If the tear is more extensive, you may need to use rubber cement to reinforce the area. Apply a small amount of rubber cement to the tear, and then use a microfiber cloth to smooth it out.
Step 4: Allow it to Dry
Allow the adhesive to dry completely, following the instructions provided in the repair kit. This can take anywhere from 30 minutes to several hours, depending on the type of adhesive.
Inspecting the Repair
Once the adhesive has dried, inspect the repair to ensure it’s smooth and even. If necessary, you can use a leather conditioner to touch up any areas that may have been missed.
Step 5: Finish and Inspect
Apply a final coat of leather conditioner to the area, and then use a microfiber cloth to buff it out. Inspect the repair one last time to ensure it’s smooth and even.
How to Repair a Small Tear in Leather Car Seat: Tips and Tricks
Here are a few tips and tricks to keep in mind when repairing a small tear in leather car seat:
- Always follow the instructions provided in the repair kit.
- Use a microfiber cloth to clean and apply materials to the tear.
- Apply leather conditioner regularly to keep the leather soft and supple.
- Avoid using harsh chemicals or abrasive materials that can damage the leather.
Common Mistakes to Avoid
When repairing a small tear in leather car seat, it’s essential to avoid common mistakes that can make the repair more difficult or even impossible. Here are a few mistakes to avoid:
- Using too much adhesive: Too much adhesive can cause the leather to become stiff and uneven.
- Applying adhesive to the wrong area: Make sure to apply adhesive only to the tear and surrounding area.
- Not allowing the adhesive to dry: Failing to allow the adhesive to dry completely can cause the repair to fail.
Conclusion
How to repair a small tear in leather car seat is a relatively simple process that requires basic tools and materials. By following the steps outlined in this article, you can repair a small tear in your leather car seat with ease. Remember to choose the right leather repair kit, clean the area thoroughly, and apply adhesive carefully. With a little patience and practice, you can achieve professional-looking results.